Sunday 29 October 2017

Last week to enter challenge 1 and some Top Tips!

QUICK REMINDER ...

You have one more week to enter the current 'Anything Goes' challenge and 
you can find all the challenge details HERE
Many, many thanks to all the wonderful entries so far.

* * * * * * * * *

Hi Lou here and my "top tip" today is to think outside the box with regards to your printing. We are all familiar with printing on printable acetate, vellums and a range of papers/cards but did you know that you can also print on other every day items ... yep, you can.

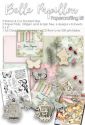
As you know Polkadoodles have a wonderful range of collections and for my next project I want to use the Belle Papillion collection ...

Belle Papillon Big Kahuna Download bundle

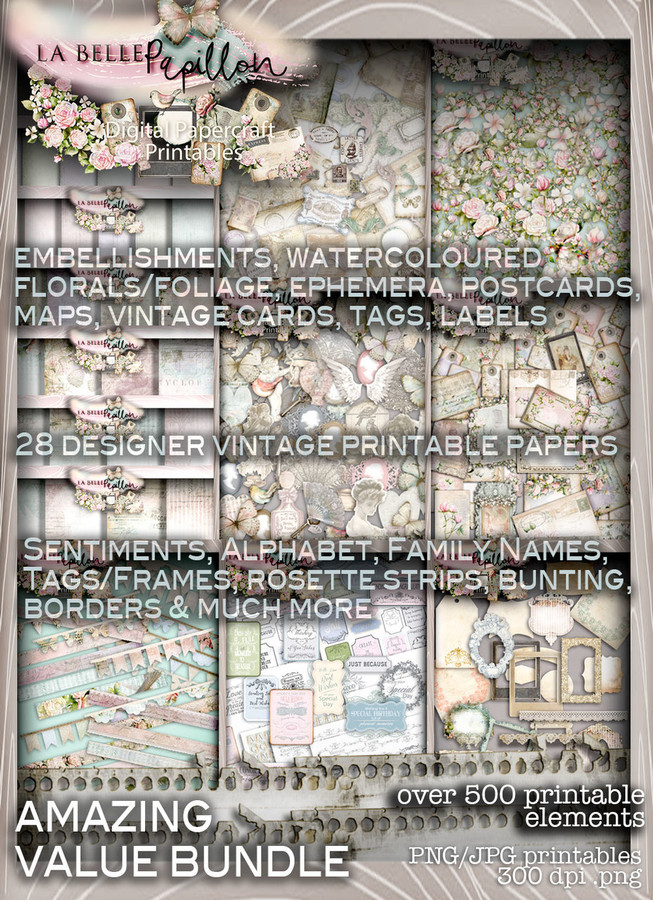
... but alas Nikky doesn't produce napkins to match! No worries because I can create the same look by printing on to kitchen towel and toilet roll! Below is a quick tutorial as to how you can work my "top tip" ...

KITCHEN TOWEL
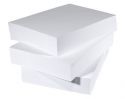
For my project, I want to use an embossed kitchen towel, (but other types will do). Begin by placing double sided tape along the top of your cheap printer paper and stick the kitchen towel in place.


Make a mark with pencil where the kitchen towel ends, and just above the mark, place another line of double sided tape. Carefully smooth the kitchen towel over the tape.


Finally, turn your paper over and either cut away excess kitchen towel or alternatively place another strip of double sided tape, securing over hang. Repeat on both sides and you are ready to print.


Below is the printed design I have chosen and all I need to do is carefully lift the kitchen towel up or alternatively cut. Voila, I have my napkin with the design I want.


If I was a really frugal crafter - especially as this is a 2ply kitchen towel - I could have left the 2nd layer in place and reprinted ...


TOILET PAPER
Now this medium is trickier to print on as it has a little more give to it. To help your printer and to make sure it grabs the paper first - and not the toilet paper - place your double sided tape about 2 cm down from the top.


Next, place your toilet paper horizontally and don't worry if it goes over the edges. As before, make a pencil mark and add your double sided tape above this mark. Carefully smooth your toilet paper in to place.


Continue down the paper until you have covered the copier paper as much as you want.


Turn your paper over and place double sided tape down the vertical edges of the copier paper, trapping the edges of the toilet roll in place.


Finally, send your chosen design to print.


As with the kitchen towel, if you carefully pull the top layer away, you can reprint another ...


Over to you to give this a try. It goes to show that digi images or papers do not always need to be printed on to paper or card! So be brave and give printing on different surfaces/papers a go. Once you start, your mind goes in to over drive ...! Please share with the team here at Love to Create the different materials/media you have printed on, so we can have a go too.

Now I have two different printed media to use on my project and they can be secured in place with PVA glue, Mod Podge etc. Next week I will show you what I have created with them.

Lou
x x x

Sunday 22 October 2017

Welcome our Guest Designer Jane

Hellooooo crafty friends!! Have you entered our challenge yet? You've still got enough time to play along as you won't want to miss out on our gorgeous prize of stamps and papers from Polkadoodles!


The theme is

Anything Creative/Mixed Media Goes

And you can enter here

You can use any products on your project!! The challenge runs until the end of the month so what are you waiting for?? LOL. Oooh I know, you're waiting to meet this weeks Guest Designer!!

This week the lovely Jane Savage has created a beautiful project for us,


Wow how beautiful! Jane has used the Bella Fleur stamp set and the coordinating Flower Branch Doublet Die. She's also used the beautiful Bubblicious Frame die.
Pop over to Jane's blog to find out how she made this beauty!!

Let's find out a little more about this weeks talented guest designer ....

Hi my name is Jane I live in Oxfordshire, UK! 
I have a mild to manic obsession with craft that started from when I was very young and has never left me (thankfully). I love dies, dies and more dies and enjoy colouring with pencils and making a mess. I don't really have a 'style' if I like where I've stuck something it stays stuck..simple as!! ðŸ˜Š

Image may contain: 1 person, smiling, close-up


Thanks so much Jane! If you'd like to check out more of Jane's artwork have a look at her blog here and if your here to add your entry to this month's challenge just click here and scroll down to link up your project!!


Sunday 15 October 2017

Welcome our Guest Designer Jan

Good morning crafty friends, we've got a fabulous project from this weeks talented Guest Designer, Scatty Jan for you today but before we have a look at Jan's gorgeous artwork just a little reminder about this month's challenge!
Our theme is

Anything Mixed Media/Creative Goes

and  we've got a gorgeous prize of stamps AND papers from Polkadoodles ....


It's so easy to enter, you can use any products to play along, just have lots of crafty fun and enter your project here!


Back to our lovely Jan who's been a busy bee making not one but three stunning tags for us....

No automatic alt text available.

Jan has used some of the awesome Oddella images from the IckyInk collection at  Polkadoodles and the Absolute Vintage Clear Stamp set to make these tags, you can find links to them at the end of this post. Here's how Jan created these little beauties .....

I cut out three tag shapes onto watercolour card and printed off three of the lovely Oddella's that you can find in the Polkadoodles store here I coloured up the Oddella's using Polychromo Pencils in shades of grey and red I used Distress Oxides on the tags mainly Iced Spruce with some splashes of Black soot. Next came the stamps I used Absolute Vintage Clear stamp set - stamping Cogs and clocks randomly. I also used a few other stamps for the circles and lines. I also had a play with a few masks. Added a little red paint to the top of each one and let it run down the tag. I lastly added a few different size sequins and a sentiment to each one The sentiments have a brush of fired brick distress ink and finished off with a little doodle

Now let's find out a little more about the lovely lady herself .....

Hi , I am Scatty Jan, the only photo's I have of me are selfies with my Granddaughter (always silly ones too) ~I started crafting 7 years ago I started out by making a scrapbook, and after trawling the internet for ideas I found card making , colouring blah de blah. I was never really into crafts as a child so was very surprised how much of a hold this took . I really love to colour up , and after years of hiding from stamps I now adore them and they are one of my favourite crafting items ~ I also adore Distress Oxides. Nothing beats a fab craft session with my best friends (My portrait and My Granddaughter) xx


Image may contain: 1 person, close-up

Gorgeous pic of our lovely Jan isn't it? As you can imagine, Jan is such fun to work with in the land of Polkadoodles! Please check out her blog as she's a real inspiration and creates some stunning projects - she's a real whiz with her Portrait!

Thanks for sharing your gorgeous tags with us Jan!!

Thanks for visiting, don't forget to click here to link up your entry to our challenge
We'll be back next week with more inspiration from a brand new Guest Designer!!

Hope to see you then :-)


Sunday 8 October 2017

Welcome our Guest Designer Angie!

Good morning crafty friends!! We're so excited as today's the day we meet the first of our lovely Guest Designers and today we're welcoming the lovely Angie Jones!! Before we check out Angie's beautiful project, just a little reminder that you still have plenty of time to enter our challenge and be in with a chance of winning these gorgeous goodies from Polkadoodles ...

 
It's sooooooo easy to enter, you can use any products to play along and the theme is

Anything Creative/Mixed Media Goes

Just click here  and scroll down to add your entry to the linky!!!

Now let's have a peek at Angie's awesome project:

No automatic alt text available.

Anjie has created a canvas and used Ula's Life Don't Listen black & white and the sentiment from Ula's Life Be Strong. 

Isn't it gorgeous, love love love that background Angie!! Check out Angie's blog here for all the details

Let's meet the lovely lady herself ....

Image may contain: 1 person, smiling, glasses and close-up

Angie Jones - I live in Queensland, Australia. 
I have always loved colouring in since I can remember....my stamping / card making started around 30 years ago.....I bought some copic markers at a craft show about 3 years ago and sort of yes. no for a year. Around 18 months ago, I did a few online classes and bam.....whole collection of markers now and I colour everyday! I have added paints / stencils and stamps to create gorgeous backgrounds. So my Mixed Media is just developing but I am loving the journey.

Thanks so much for sharing your beautiful artwork with us Angie!

If you'd like to see more of Ula's Life, the collection Angie has used you can find it here. It's full of beautiful papers, sentiments, digistamps (black and white plus precoloured), and a selection of cutting files to make your own stencils too!!

Ula's Life SPECIAL EDITION (mini CD rom) - Digi Droplets craft digi CD

We'll be back next week with another fabulous guest designer so make sure you pop back then and don't forget to add your entry to this month's challenge ....

Just click here  and scroll down to add your entry to the linky!!!


Sunday 1 October 2017

Mixed Media Tutorial by Claire

Good morning crafty friends! Claire here with a tutorial using lots of gorgeous goodies from Polkadoodles to create a mixed media canvas. First things first though, don't forget to enter our challenge ...  
 Anything Creative/Mixed Media Goes

we've got an awesome prize and you don't want to miss your chance to win these beauties!!


Just click here and scroll down to add your project to the linky!!

For my tutorial I've used lots of my favourite Polkadoodles products (you can find links to all the stamps, dies and the beautiful cd collection at the end of this post) to create an A4 canvas:


After spending a happy hour browsing through all the beautiful elements on the Belle Papillon collection I decided on my colour scheme and printed off lots of lovely goodies to use on my project. I always print sheets that I want to collage onto copy paper and for the other layers I use Ultimate Graphic 160gsm paper (link at end of post) from Polkadoodles - it's brilliant for printing on and the best card I've found for using alcohol markers too so it's also great for digistamps.


Once I'd printed everything out, I used Liquitex Matte Medium to stick the papers to my canvas board - I just tore papers and layered them up. I often use a wash of diluted white gesso at this stage but everything was fairly muted so I didn't bother on this project. Next job was to stencil in some ivy use a little green acrylic paint.


I also stencilled in some roses, again using acrylic paint, I only wanted part of this stencil so I positioned it and masked the unwanted areas with post-it notes before getting busy with the paint and a little cut'n'dry foam.


Once the paint was dry I repositioned the stencil and applied a layer of Superthick Slap it on - any 3d glossy gel medium will do for this. 


Remove the stencil and sprinkle on clear microbeads - these little jokers go everywhere so I find it best to use a container to catch them rather than trying to use paper as you would with glitter/embossing powder.


While that was drying I chose the next layer of elements for my canvas. I also used the paint left on my cut'n'dry foam from the stencilling to dye some seambinding ribbon - just dab the foam in a teeny bit of water and there will be a lovely puddle of colour to swoosh the ribbon through!


Next is a bit of an assembly job using silicone glue - I didn't use all the elements I'd cut out as I didn't want to cover all the background up but I'll use them on another project. I also added ribbon and little brads to the tags I'd printed.


Next I added splatters of white pearl and gold acrylic paint, just dilute the paint with water and flick with a brush or tap the brush on another to create the splatters.


Here's a pic of the background so far, I looooooove splatters lol so tend to get carried away


Next comes the best bit, lots of die cutting and stamping. I've used watercolour paper for this as I wanted to paint with distress inks. I find it easiest to die cut first, ink up the stamp and lay the die cut over the stamp and press with an acrylic block. The flowers are cut from Foamiran, coloured with gelatos, heated with my heatgun to shape and then layered. The butterflies were made out of lots of layers of the music sheet paper that I'd printed onto copier paper - I used 5 layers for each butterfly.


Next assemble the die cuts and add some raffia, angel hair and a few resin roses highlighted with gilding wax to finish the canvas


Thanks for visiting, I hope you've enjoyed my tutorial!! 

Don't forget to enter your project in this month's challenge.
 Just click here to go to the link up.

We'll be back next week to introduce our first Guest Designer!!
We're so excited!

Claire xx